In this guide for beginners, I’ll be telling you how to use a router table. From introducing the different types of tables to showing you around the various parts. I also share a step-by-step guide to setting it up and a quick introduction to the most common uses for this type of table.
A router is very handy for a variety of projects, both decorative and functional. You can use it for a range of trimming and cutting tasks, and it’s incredibly portable.
It’s possible to use a handheld router without a table, but you’ll be amazed by the finish and smooth surfaces you can achieve if you use a router table.
For the complete novice, a router table can be overwhelming. It’s not easy to use, but you’ll be able to take your woodworking projects to the next level with some guidance and practice.
Do I Need a Router Table to Use a Router?
The quick and simple answer is no you don’t—for the majority of woodworking tasks. However, if you use one, it will make a tremendous difference to your projects. The design of most routers means you can hold them in your hands or mount them onto a router table.
There are several benefits to using a router table compared with a hand-held router. These include:
- Safety: A router table gives you better control over your workpiece.
- Perfect edges: Your work will be more professional-looking and precise.
- Convenient: You don’t have to waste time clamping your piece to a board, and a table leaves you with both hands free.
- Precision: The table supports smaller pieces and makes it more comfortable to work with them.
- Cleaner: There is often a dust collector that cleans up your mess.
It’s possible to make your own router table, but there are also various types of router tables you can buy. Let’s look at some of them in more detail, so you can decide which one is best for your needs.
Standard Router Tables
A standard router table is popular with woodworkers of all skill levels. It’s a little bigger than a compact table and suitable for a wide range of woodworking projects. Essential features will include a flat top and base plate, T-slots and miters, a sturdy base, and simple to secure fence.
Floor Standing or Cabinet Style
Stand-alone legs or a cabinet support a workstation of this style. One bonus with a cabinet style table is that you get extra storage space underneath your workstation. Use it to store your router, various bits, and accessories.
Full Router Table System
For the more experienced woodworker, a full router table system comes with all the bells and whistles. It’s a table that includes advanced features for more complex projects and delivers precise and top-quality results.
Practical extras might include a digital readout attachment, remote power switch, and other accessories.
Benchtop
A benchtop table is the most portable type of router table, and its design allows you to use it on a workbench or counter. It takes up a small amount of workspace, and when you’ve finished, you simply store it away.
Compact Router Tables
This table’s size means it’s not best suited for large projects, but if you’re a hobbyist with limited space, enjoy small craftwork, and regularly perform quick fixes, a compact table is ideal.
Typically, you can place this type of table in a corner, and it’s easy to carry if you want to take it with you. Foldable designs are also available.
Parts of a Router Table
Understanding the construction, features, and specifications of a router table means you’ll be able to purchase one that suits your needs and make the best use of it. Check out the most common features of a router table.
Table Top
The most used feature is the table top. More often than not, the top is MDF or Medium Density Fiberboard. This material is denser than plywood, another common table top material, but it is denser and therefore sturdier and more durable. MDF is also one of the more affordable materials.
If, however, your projects will be more heavy-duty and long-lasting, a tabletop made using phenolic resin will be more rigid and stable. Another option if you’re looking for durability is cast iron.
All these materials are suitable because they don’t warp, are entirely flat and even. All these qualities are vital if you don’t want to compromise your molding’s shape.
Legs or Base
The table top of a router table is mounted to either legs or a base. The base could be a cabinet or something more solid.
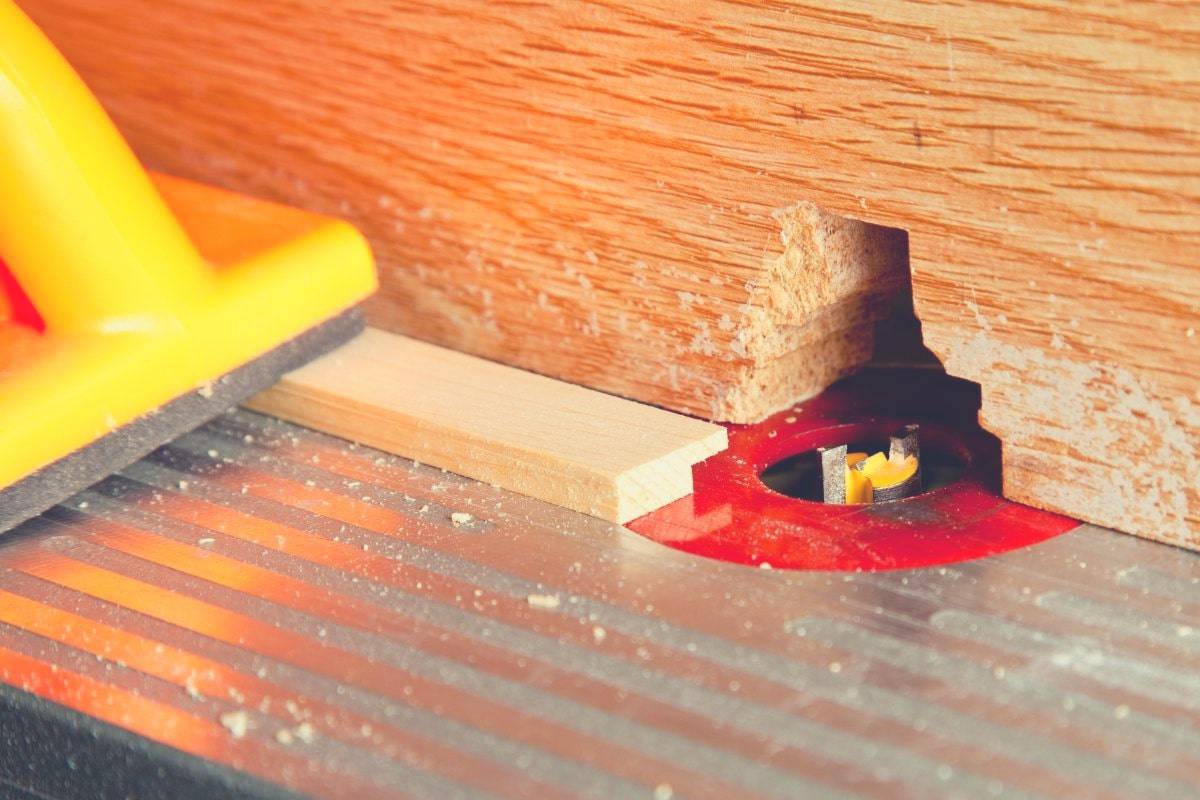
Base Plate
The base plate is what you use to attach your router to the table. It fits into a slot on the top of the table, and ideally, it should be perfectly flat.
The plate is generally machined aluminum, but it might also be solid phenolic aluminum. Both materials are sturdy and hard-wearing.
The plate must be compatible with your router and fit rigidly and level to the table. Many tables have a leveling system. It allows you to make adjustments to ensure the plate is balanced and secure to help get a perfect fit.
Lots of options are available to make sure you have the right base plate. For example, you can get one-size-fits-all, pre-drilled plates, and blank plates.
Fence
You have several options when it comes to the fence of your router table. It is the feature that keeps your workpiece in place when you’re cutting. To control the cut, you press your workpiece against the fence as it advances past the bit.
The quality and functionality of the fence vary considerably. They range from the most basic, which is little more than a straight piece of wood clamped to the table’s surface. At the other end of the scale are after-market fences that include advanced features such as incremental positioning mechanisms.
Nevertheless, the fence’s most important features are that it must be straight, square, and rigid. Ideally, it should also be easy to position, have a wide adjustment range, and be secure when locked down.
There are two types of fences: a one-piece fence and a two-piece fence, also known as a split fence.
A split fence has two adjustable sections that are independent of each other. This can be an advantage but also creates an alignment problem. Both sides of the fence have to be in almost perfect parallel alignment, which can sometimes be challenging.
Feather Boards
A feather board is designed to apply pressure to the material while you pass it over the router, holding the work piece firmly in place. It’s made from “fingers” with small grooves in between, which provides flexibility.
Feather boards offer both safety and accuracy compared to guiding with your hands. Importantly, the applied pressure is constant and it prevents backward movement.
Also, the fact that you can get the feather board closer to the router means greater accuracy. They’re useful for delicate jobs such as edge forming, rabbeting, and grooving.
That said, the safety benefits make them useful in almost any situation.
T-Track
A T-Track is an addition that you’ll find in various locations on the table top. You use the track for securing stops, featherboards, and other router table attachments.
Not all tables have a T-Track.
Bit Guard
Safety of the operator should be a primary concern, as there is potential for injury when using a router. The bit guard is an important feature as it keeps your fingers away from the spinning bit and protects your hands when cutting. It also stops chips from flying up into your eyes.
Starter Pin
There are certain cuts that a fence won’t work for. On these occasions, a starter pin is what you use.
It gives you better control over your workpiece because it creates a fixed point. Using the pin, you can pivot your workpiece, easing it carefully into the router bit. This motion also helps to reduce kickback.
Using a starter pin, you can safely rout the ends of a narrow workpiece and work with patterns, templates, and curved workpieces better.
Setting up a Router Table: A Step-by-Step Guide
Now you’re more familiar with the types of router tables and their component parts, it’s time for me to give you a step-by-step guide to setting your table up.
Before I start with step one, let me first remind you to wear personal protective equipment. To keep yourself safe, use eye and hearing protection and a good quality respirator. Follow the manufacturer’s instructions for your table and router and work safety rules.
Step 1: Selecting a Bit
There are many different router bits to choose from. Select one with a profile for the cut you want to make. It might be a straight cutting bit, one that cuts a groove such as a cove bit, an ogee, or guide bearing.
Also, check that the bit has the correct shank size for your router. The shank fits into your router’s collet, and it will usually accept either a 1/2” or a 1/4” shank. Some router models allow you to fit either size because they have a removable collet.
If you want a smooth cut and experience less vibration, choose a 1/4” bit.
Step 2: Fit Bit into Collet
You attach a router bit to a router table using a collect. Before you fit the bit into the collet, make sure your router is unplugged from the power supply or remove the battery.
When you insert the bit, leave around a 1/8” space between it and the collet. You do this because the collet will draw the bit in as you tighten the locking nut. The tool you use to lighten the locking nut is a wrench.
If the bit is already touching the collet when you try to tighten it, you might not be able to tighten it fully. A bit that is not in the collet securely could come loose, fly out, and possibly cause serious injury.
Leaving a space also allows for expansion. After all, your router bits are going to heat up very quickly, and this causes expansion.
Step 3: Set the Height of the Bit
You need to set the height of the bit. It determines how much of the bit is exposed or how much it will cut into your workpiece.
You can adjust the height in one of the following ways:
- Combination square
- Gauge blocks
- Digital gauge
- Router lift
- Router’s depth adjustment
Watch this video to find out how to use the router’s depth adjustment.
Step 4: Fitting and Adjusting the Fence
You’ll use the fence as a guide for your router so setting this up correctly is crucial. It doesn’t have to be exactly parallel to anything because the bit is round. The most important thing is to set the fence at a correct distance away from it. Once you’ve done this the bit gets on with the rest.
How you set the fence depends on which type of bit you’re using.
For straight cutting bits, you adjust the fence from the front. Use a ruler across the bit’s center and rotate its cutting tip towards the fence. Adjust to ensure it’s the right distance away and then secure the fence.
When you’re going to use a piloted bit or a guide bearing, you should position a straightedge across the fence. You can then adjust the fence, so the gap between the bit’s bearing and the straightedge is no thicker than a piece of paper. You can then tighten the fence.
Step 5: Test Your Machine
Once you’ve adjusted the fence, you should test your setup using scrap pieces of wood. Make sure you set everything up before you start working on your project.
If you need to make a further adjustment, draw a line with a pencil on the table next to the fence. If you loosen the left end of the fence, you’ll be able to pivot it closer or farther away. Tighten it up when you think it’s right and make another test cut.
Step 6: Workpiece Feeding
The bit on your router runs in a clockwise direction. When you feed your workpiece into the router, you should always push from right to left. The key is to feed the wood in the opposite direction to that of the spinning blade.
Start with small cuts and get in some practice before moving on to more significant projects.
How to Use a Router Table – 6 Common Uses
There is so much you can do with a router table than just cut pieces of board. I’ve compiled a list of some of the most common uses for this versatile product.
Edge Trimming or Pattern Work
Edge trimming and pattern work are two of the most common uses. You can use your table to smoothly and expertly trim edges.
Say, for example, you want to make a specific arch or curve for a door. Find the right template and attach it to the panel of the door. Use your router and table to trim the exact shape.
The table allows you to have both hands free for gripping the board, controlling the pattern, and achieving the desired result.
Stopped Cuts
A stopped cut is only visible on parts of the stock. A table, for example, might have stopped cuts running along the edge or on surfaces to improve the aesthetics. This type of cut is also common when using finger joints, or half-blind dovetails in a drawer.
You use a T-slot to safely and accurately position your cuts for fast and precise results.
Raised Panel Doors
Making raised panel doors is one task you’ll struggle to complete without a router table. You would use large diameter bits to make a raised panel, but it’s a hazardous chore if you try to use them with a hand-held router. There is a risk of the bit catching and it’s also possible to lose some control of the router. Using a table makes the process more secure.
Molding Small Stock
Similarly, working on narrow or small stock is also difficult if you’re using a hand-held router. Keeping a grip on the wood pieces is nigh on impossible because you’re using both hands to hold the router.
With a router table, there’s no such problem. You can work on any size workpiece. To improve your control even further, use a feather board. The table allows you to have both hands free to hold accessories or other parts while at the same time providing a sturdy base for placing your workpiece.
Joinery Techniques
There are several joinery techniques you can use your router table for, provided you’ve got the right bits.
Useful bits to have include:
- Drawer lock bit: You can use it for making box shapes.
- Lock mitre router bit: Try this bit to cut a connecting mitre that accurately fits the joint, improves its quality and locking power.
- Finger joint bit: Use it to achieve one of the most complex joinery techniques, a finger joint
Another joinery technique you can use your router for is planing. This is a crucial step when preparing wood for jointing. Planing is important because it removes imperfections and ensures edges are perfectly straight.
Router Table as a Jointer
One overwhelming quality of a router table is its ability to serve as a multitasking tool. Using it as a jointer is a useful option, especially if your workspace is tight or your tool budget is limited. You’ll need a few special bits to achieve the right results, but your table will provide excellent results without the added expense of purchasing a jointer.
Final Thoughts
In my beginner’s guide, you’ve learned how to use a router table. You’ve also been introduced to the different parts of a router table, how to set one up, how to feed wood into the table, and many of its various uses.
I hope you’ve enjoyed this introduction to using a router table. With practice, you’ll soon appreciate the benefits of having one and be able to work more efficiently.
If there’s anything you’d like to add, please leave a comment in the section below.