A jigsaw is an invaluable addition to your toolbox. It’s for some of the most challenging cutting tasks, whether you’re remodeling your bathroom or kitchen or tackling a fine woodworking piece.
You can use it to cut straight lines, curves, and intricate patterns in various types of material, from sheet metal to plastic and wooden boards.
Learn the value of a jigsaw, how to use one, and get the confidence to tackle your next DIY project. I’ll also be introducing some of the most common cuts you can make with this flexible tool.
Do You Need a Jigsaw?
A jigsaw is one of the most versatile power tools out there. When you compare it to other tools such as a table saw, miter saw, or circular saw, it’s relatively inexpensive. However, it’s the perfect tool to have whether you want to cut straight lines, curves, or shapes. Cost is not the only reason you need to get one.
They’re an all-singing, all-dancing cutting tool that is one of the least intimidating power tools to use. Perfect for the beginner!
You can wield it to cut a wide variety of things. Laminate, metal, wood, and plastic are a few examples. Learn more about this tool’s intricacies and how to use your jigsaw to make detailed cuts and to cut out shapes.
You can even make angled cuts with it. All you need to do is make a few simple adjustments, such as pivoting the jigsaw’s shoe and setting it at the angle you require.
How to Use a Jigsaw Step-by-Step
A jigsaw is not too unwieldy, and you can use it to cut straight and curved lines in various materials. Nevertheless, there is a right and wrong way to use it.
This step-by-step guide will go over how you should safely set up your jigsaw and use it to make basic cuts.
Step 1: Choose the Right Blade
Having the right blade for the job at hand is crucial. Using the wrong blade is a mistake often made, especially when you’re a beginner. This tool’s versatility means there are many blades to choose from.
When selecting your blade, consider the following:
Type of Shank
Jigsaws are shank specific, so make sure your blade is compatible with your jigsaw brand. The most common shanks are U-shank and T-shank blades.
Number and Size of Teeth
The larger the teeth, the quicker the cut, but they will produce a rough finish. Small teeth are slower but make a finer cut. The measurement for the number of teeth is TPI, or teeth per inch.
A low TPI relates to a lower number of saw teeth per inch. A 10- to a 12-TPI blade is suitable for making large, gradual curves. At the same time, a 20-TPI blade is more effective for making tight curves.
Width of Blade
Jigsaw blades are typically 1/4” or 3/8”. Use 1/4” blades for tight radius curve cuts. 3/8” blades are better for making gradual curve cuts.
Teeth Direction
Standard blades have teeth that point upwards. The teeth cut the upstroke. This is an all-purpose cutting blade.
When the teeth point downwards (a reverse blade), you should use it to cut material with a pre-finished surface. The reverse blade reduces nicking or chipping.
Is a Specific Blade Available?
Many blades are application-specific. They might be for softer or harder woods, metals, or plastics. Look on the packaging or the label for directions. Bi-metal blades are better suited for cutting through thin metals.
Once you’ve decided on a blade, you can mount it, making sure you disconnect your jigsaw from the power supply.
To mount the blade, you release the blade clamp and hold the blade in place. You can then secure it in place.
Step 2: Prepare the Workplace
You don’t need a garage or a fancy workspace to use, but you will need a steady surface to work on.
A couple of sawhorses will provide a very steady surface because you can lay a piece of wood over them to act as a work surface.
Alternatively, balance your workpiece between the horses when you want to cut a whole.
When you’ve finished cutting, fold them up and put them away.
Clamps are also super important. Use them to secure the material you’re cutting to your sawhorse, bench, table, or workstation. You’ll also have two hands free for navigating your saw along or around the cut line.
Make sure that the area where you’re going to cut extends over the edge of your cutting surface. Use a minimum of 2 C-clamps on the edge of the work surface.
Clamps aren’t essential if the cut you want to make is vertical.
Step 3: Measure and Draw a Cutting Line
If you want to make an accurate cut, it’s always better to measure and mark out where you want to cut.
For specific shapes such as a hole for an electrical socket or sink, draw around the object. A template will be handy if you want to cut other shapes. You’ll be able to make a better cut if your cut line is accurate. A compass or a straight edge also makes precise cutting lines.
If you follow along the outside edge of the mark when making your cut, it means you won’t accidentally overcut the material.
Step 4: Set the Blade Speed
Jigsaws have a dial for adjusting the speed of the blade. If you want the blade to move faster, you choose a higher number. Keep the setting low until you become more accustomed to using your jigsaw.
Slow speeds are better for making accurate cuts when cutting through metal or PVC.
Use a faster setting when you cut laminate or wood as it reduces the number of vibrations and results in a cleaner cut.
Step 5: Make the Cut Along the Cutting Line
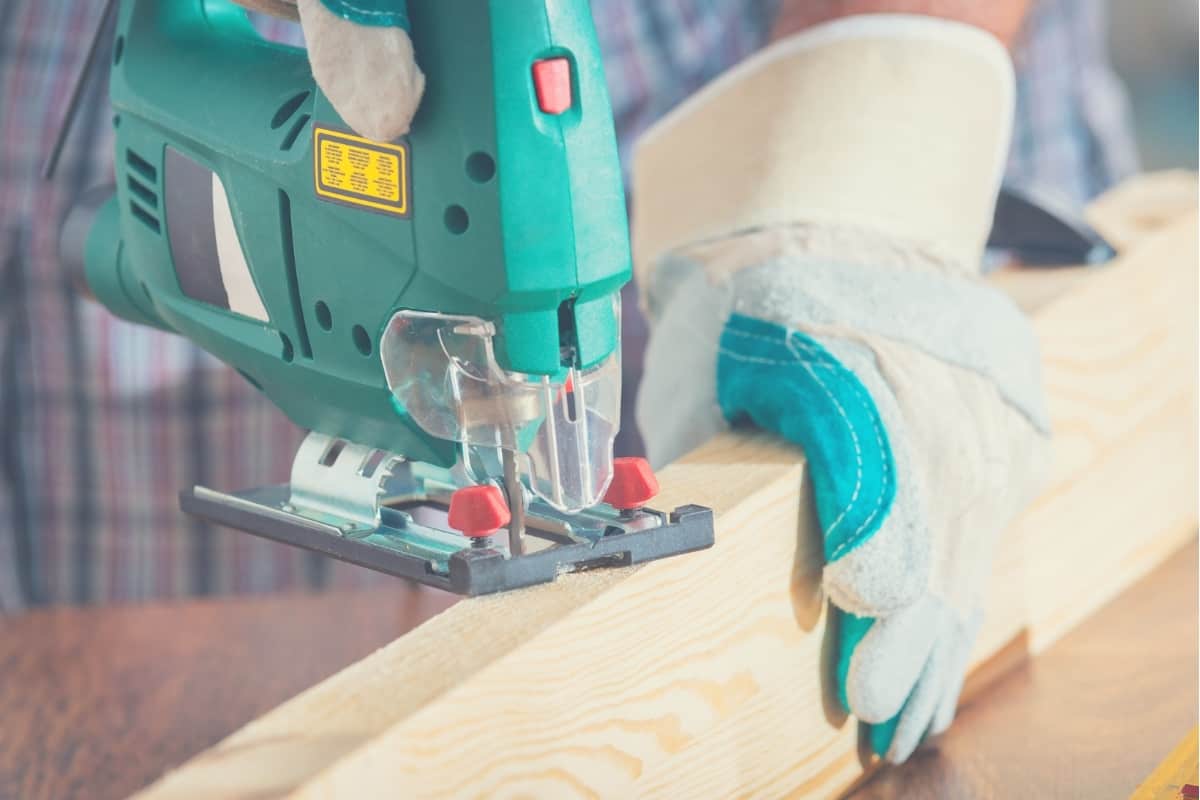
When you’re ready to make the cut, rest the base plate or the shoe flat against the material, you want to cut. Align the cutting guide, located at the front of the shoe, with the line you’ve marked out on the material.
Hold the jigsaw back a bit, and then switch it on. You can then ease forward and begin cutting.
It’s essential to wait until the tool is running as this will stop the blade from catching on the wood. It also reduces any chance of the saw jerking, the blade breaking, or making a cut in the wrong place.
Firmly push your saw into the workpiece and guide its blade along the cut line. You can guide the blade by gently twisting the back in the opposite direction to where you want the saw blade to travel.
Keep your fingers away from the cutting edge of the saw while cutting.
Cutting Tips
With practice, you’ll learn to recognize whether you’re pushing too hard. It’ll feel like the saw is straining, or you might feel a small kickback. As soon as you feel this, slow down. Otherwise, you’ll miss your cut line, splinter the workpiece, or damage the blade.
Be careful when completing your cut as letting the excess material drop off before you finish the cut could lead to a splintering or the workpiece or the blade will bind. You also need to make sure any falling material doesn’t hit the power cord or you.
A Few Important Safety Tips
Your jigsaw might be a small power tool, but that doesn’t mean it’s not powerful and potentially dangerous to use.
Make sure you use personal protective equipment, as in eye-protective goggles and earmuffs.
Jigsaws can produce excessive noise when cutting different materials, which means it’s vital to protect your ears. Eye protection, such as safety glasses or goggles, are necessary because the saw’s cutting action creates tiny particles that could damage your eyes.
Other PPE you should wear includes a dust mask and safety footwear.
If you’re using a corded jigsaw, keep the cord away from the cut line. Jigsaws often have a very short cord, which can be very limiting. An option is to use an extension lead, but make sure it’s long enough to allow sufficient movement and not too long to be a hazard.
The blade is relatively exposed, so be careful to keep your fingers away from it.
Ensure it’s unplugged or has the battery removed before you make any adjustments to the blade or remove it.
One final safety tip is to only use a jigsaw in dry conditions. You increase the risk of injury if you use it in the rain, in a wet working area, or to cut wet materials.
Jigsaw Cutting Techniques
With a jigsaw, you can cut a variety of shapes and materials. I’ve already covered the cutting basics. Now it’s time to look at some specific types of cutting techniques.
Internal Cuts
An internal or inside cut is not one of the most common types of cut, but you might need to make one every once in a while. It’s not a cut that starts at the edge of the cutting surface, so you have to drill a hole first before you begin to cut.
Make sure the hole you drill is bigger than the blade of your jigsaw. Insert the blade into the drilled hole and cut outwards to the edge of the shape.
If you don’t want to or can’t drill a pilot hole, you can use your jigsaw to make a plunge cut. To make a plunge cut, you place the front of the shoe against the wood. Start the blade at around half speed and drop it down into the wood at the same time as you draw it forward.
Make sure you do this action slowly, use a blade with a sharp tip, and only make a plunge cut in soft materials such as plasterboard and wood.
This is a cut that’s better left for when you’ve got more experience, but there’s no reason why you shouldn’t get in some practice. It’s a tricky technique but valuable if you haven’t got a drill near and handy.
Cutting a Circle
First, you need to draw a perfect circle using a compass or by tracing something circular onto your piece of material. You could also improvise with a pen or pencil, a length of string, and a pin.
Watch this video for a couple more ways to draw a perfect circle.
You then use the technique for making internal cuts. Drill a hole inside the circle you’ve marked out. Insert the blade of the jigsaw into the hole and slowly cut around the edge of the circle.
Keep the speed low and if possible, practice this type of cut on a spare piece of wood first.
Cutting in a Straight Line
Use a straight edge, such as a ruler, to mark a straight line on the material you want to cut. Measure the distance from the edge of the shoe to the side of the blade.
Next, clamp a piece of wood or something else with a straight edge so that it’s the same distance from your cutting line. This will be your guide. Clamp both ends of the guide tightly.
Make sure the shoe of your saw slides along the edge of the guide, and you’ll have a perfectly straight cut.
The following video demonstrates cutting a straight line:
Cutting Countertops
Laminate countertops can be challenging because the brittle laminated layer easily cracks or chips if you don’t handle it correctly.
To prevent damage to the worktop, you should take careful measurements and then make the cut using the correct technique and the proper blade.
A reverse teeth blade will make a cleaner cut. The teeth cut on the downstroke, which means they won’t crack or rip the countertop’s laminated layer.
You can start by drilling a starter hole in the countertop slightly larger than the blade you’ll be using. Drawing your cutting line on masking tape will also help to reduce the chance of marring.
To further protect the surface of your laminated countertop from the bottom of the shoe, it’s also a good idea to leave the protective film on the surface when cutting.
For a clear explanation of countertop cutting, watch this video.
Cutting Plywood
Plywood is particularly difficult to cut without splintering if you don’t use the right blade. It’s a common problem, especially for novice users.
This material splinters for several reasons.
It could be you’re using the wrong blade. The blade could be old or covered with pitch or sawdust, which makes it blunt. You could also be using too much pressure or rushing the cut.
The best blade for cutting plywood is a thin blade as it will give you a fine cut and reduce the chance of splintering. The blade should also have a lot of fine teeth, typically 20-TPI or above.
Another trick to prevent splitting is to use masking tape over the cutting line on the workpiece’s top and bottom. If the masking tape is transparent, you can mark the cutting line on the tape. Using a backer board or scoring the cutting line before cutting also prevents such damage to the finished piece.
Cutting Ceramic Tile
Ceramic tiles are very brittle, and cracking is a risk when you try to cut them. With the right blade, you’ll be able to cut a ceramic tile safely and cleanly. You’ll also be able to make openings, slanted cuts, and notches.
A typical jigsaw blade is not the correct one to use, as its sharpened teeth will easily crack the tile and break it apart.
The right blade to use is one with an abrasive carbide edge or a diamond blade. These blades use a grinding action rather than teeth to create a cut.
If you need to make an interior cut, you must first drill a starter hole using a ceramic or glass tile bit.
Cutting tiles is a slow process. You must also clamp the tile and use a light mist of water or cutting oil for lubrication. Water is sufficient for thin tiles, but thicker tiles require oil along the saw cut.
To prevent any damage from the saw shoe, apply masking tape. You must wear a face mask and protective eye goggles to protect you from any flying debris.
Cutting Metal
There is a risk of the metal shredding if you don’t clamp your workpiece between two thin plywood sheets. Make sure the clamps are secure and tight.
The correct blades to use are metal-cutting blades with 21- to 24-TPI. For a smooth cut, you also need to be very patient as cutting is slow-going.
Use the correct blade, and your jigsaw will cut through 1/8” mild steel, sheet metal up to 10 gauge thick, wood with embedded nails, and no-iron pipe.
If you want to make pattern cuts, you must first drill a starter hole. A plunge cut is not an option when cutting metal.
Features such as variable speeds, a long blade stroke, orbital cutting action, and higher power will make cutting metal easier. However, these features tend to be on more expensive models of jigsaw.
A vacuum hose connection is another useful feature as it will help keep the cutline free of debris.
When cutting metal, remember your blades are under intense pressure, and they will wear out quite quickly. It’s a good idea to have plenty of blades available, so you don’t hold up your cutting progress.
Final Words
A jigsaw is a versatile tool to have in your workshop. You can use it to cut tile, metal, lumber, plastic, and plywood. As long as you use the right blade and technique, you’ll be able to expertly cut intricate shapes, straight lines, and curves.
This how to guide will help you grasp the basics, so you’re not intimidated by this useful power tool. Follow the tips I’ve shared, and you’ll grow in confidence and be able to make good use of your jigsaw in no time.
If you want to share some of your own tips, please take a moment to leave a comment below.